

Why the myAlerts App Is Important When Exploring Moab’s Backcountry
Moab’s backcountry is one of the best places in the country to explore by Jeep, mountain bike, ATV or on foot. The same remote landscapes that make the area unforgettable can also create serious challenges when the weather changes or an emergency develops.
Flash floods, wildfires, lightning, high winds, extreme heat and unexpected road closures can affect backcountry travel with little warning. One of the easiest ways to improve your situational awareness is to download the free myAlerts mobile app before leaving town.
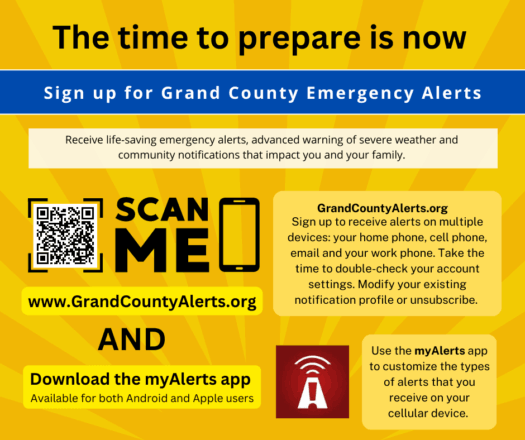
Grand County Emergency Management recommends that residents and visitors download myAlerts and sign up for local emergency notifications. The app can deliver location-specific weather warnings, government emergency alerts and community updates directly to your phone. (Grand County Emergency Management)
What Is the myAlerts App?
myAlerts is a free public-safety application developed by Konexus. It provides location-based notifications from sources that can include:
- National Weather Service alerts
- Government-issued emergency notifications
- Wildfire and evacuation information
- Flash-flood warnings
- Severe thunderstorm and lightning warnings
- Hazardous-material incidents
- Road closures and community advisories
- Other local public-safety notifications
No account or personal registration is required to use the public app. According to Konexus, the app does not collect personal information other than the device location you may choose to share. You can monitor your current position or add multiple locations manually. (Konexus myAlerts Support)
That flexibility is especially useful in Moab. You can monitor your lodging, downtown Moab, a trailhead, a campground or another location where members of your group will be spending the day.
Why myAlerts Matters in the Moab Backcountry
Flash floods can begin miles away
A sunny sky directly above you does not necessarily mean there is no flood danger. Rain falling miles upstream can send water, mud and debris through a normally dry wash or narrow canyon.
Popular routes such as Onion Creek, Kane Creek, Long Canyon and trails near washes or canyon bottoms may be affected by storms that are not immediately visible from your location. Receiving a flash-flood or severe-weather warning may give you time to leave a drainage, avoid entering a canyon or change your route.
Never enter moving floodwater, even in a Jeep or other four-wheel-drive vehicle. Water can hide washed-out roads, large rocks and deep channels.
Wildfires and smoke conditions can change quickly
Wildfires may lead to road closures, evacuation notices or changes in access to public lands. Wind can also move smoke into an area that appeared clear earlier in the day.
myAlerts can provide participating public-safety agencies with a way to send location-specific warnings. This can be valuable when exploring unfamiliar roads or traveling between Moab, Canyonlands National Park, the La Sal Mountains and other remote areas.
Desert storms bring more than rain
Summer thunderstorms can produce lightning, strong wind, blowing dust, hail and rapid temperature changes. Lightning is particularly dangerous on exposed overlooks, ridgelines and open slickrock.
Weather alerts can help you recognize when it is time to leave an exposed area, return to your vehicle or reconsider your plans.
Road closures can affect your way home
Backcountry roads can be closed because of flooding, wildfire, rockfall, construction or emergency operations. A closure may affect the route you planned to use when returning to Moab.
Community and emergency notifications may provide useful information before you reach the closure. However, public-safety and community-alert coverage depends on whether the local agency participates in the Konexus system. National Weather Service alerts may still be available in areas without participating local agencies. (myAlerts App Store information)
How to Download and Set Up myAlerts

Complete the following steps while you still have reliable Wi-Fi or cellular service.
Step 1: Download the correct app
For an iPhone or iPad, download myAlerts from the Apple App Store.
For an Android phone or tablet, download myAlerts from Google Play.
Make sure you select myAlerts by Konexus, Inc. There is also a separate Konexus business application, so confirm that the app name is myAlerts before installing it.
The current minimum operating-system requirements are:
- Apple: iOS or iPadOS 16.6 or newer
- Android: Android 8.0 or newer
Step 2: Allow notifications
When the app asks for permission to send notifications, select Allow.
This is one of the most important parts of the setup. If notifications are blocked in your phone’s system settings, you may not see an incoming warning even if the app has the correct location saved.
Allow notification banners, sounds and lock-screen notifications. Emergency information is not very helpful if it remains hidden inside the app.
Step 3: Open the Locations tab
Tap the map or Locations icon at the bottom center of the screen.
This section shows the places the app is monitoring. You can add several locations and adjust the alert settings for each one.
Step 4: Add Moab or another specific location
Tap the plus sign to add a location. You will have two choices:
- Search for Location: Enter an address, city, ZIP code or destination.
- Add Current Location: Use your phone’s GPS position.
For a Moab vacation, begin by adding Moab, Utah, or the address of your hotel, vacation rental or campground.
You may also want to add the approximate location of your planned trail or destination. Because backcountry roads do not always have conventional addresses, a nearby trailhead, landmark or GPS-detected location may be more useful.
Step 5: Turn on Monitor Current Location
At the top of the Locations screen, enable Monitor Current Location.
This feature allows myAlerts to update your monitored position as you travel. It can be particularly valuable when you leave Moab and travel into a different part of Grand County.
To use continuous location monitoring, your phone may require you to select Always Allow for location access. If you permit location access only while actively using the app, myAlerts may not be able to update your location while it is running in the background.
Continuous location use can affect battery life, so begin the day with a fully charged phone and carry a charging cord or portable battery.
Step 6: Choose your alert preferences
Open each saved location and review its alert options.
You may be able to select how sensitive you want weather notifications to be. For example, you can choose to receive only the most serious warnings or include watches and advisories.
For backcountry travel, it is generally better to receive a little more information. A severe-thunderstorm watch or flash-flood watch can help you reconsider entering a canyon before conditions become dangerous.
Step 7: Review Quiet Hours
Open the Settings tab by tapping the gear icon.
The Quiet Hours feature can silence non-emergency notifications during a selected period. Emergency alerts may still come through, but your phone’s system settings ultimately control how notifications are displayed.
If you are camping overnight, consider whether silencing weather notifications is appropriate. An overnight flash-flood or wildfire warning could be important, especially when camping near a wash, river corridor or dry drainage.
Step 8: Send yourself a test notification
From Settings, select Test Notification.
Confirm that the test appears on your lock screen and produces the sound or vibration you expect. If it does not appear, check your phone’s notification permissions, focus mode, battery-saving settings and background-app restrictions.
Do not wait for a real emergency to discover that notifications have been disabled.
Step 9: Learn how to read an alert
The Alerts tab offers two ways to review information:
- List View: Shows current and expired alerts, with the newest alerts first.
- Map View: Displays alerts as pins on a map
Tap an alert to see its complete details, including:
- The affected area
- When the alert was issued
- When it expires
- The agency that issued it
- A map of the affected location
- The complete warning message
- Recommended safety instructions
You can also share an alert with other members of your group.
Set Up the App Before Leaving Moab
Do not wait until you are miles down a backcountry trail to download or configure myAlerts. Cellular service is limited or unavailable across much of southeastern Utah.
Before leaving town:
- Download the app.
- Add your destinations.
- Enable location monitoring.
- Test your notifications.
- Review the weather forecast.
- Download offline maps.
- Tell someone where you are going.
- Carry extra food, water and clothing.
- Bring a charging cable or battery pack.
- Establish a turnaround time.
Understand the App’s Limitations
myAlerts is an important preparedness tool, but it is not a substitute for sound judgment, advance planning or emergency communication equipment.
Push notifications generally require a cellular-data or Wi-Fi connection. If your phone has no service when an alert is issued, you may not receive it until your device reconnects. The app also cannot call for help on your behalf.
For truly remote travel, consider carrying a satellite communicator or personal locator beacon. Always leave your route and expected return time with someone who is not traveling with you. In an emergency, call 911 whenever service is available.
A Simple Step That Can Make a Big Difference
Most backcountry emergencies do not begin with one major mistake. They often develop through several smaller problems: a storm arrives earlier than expected, a wash begins to rise, a road closes or a group stays out longer than planned.
Downloading myAlerts only takes a few minutes, but the information it provides may help you recognize changing conditions before they become an emergency.
Before starting your next Moab adventure,install the app, enable your location and test your notifications. Then enjoy the backcountry with the freedom that comes from being better informed and better prepared.